Sunday, 31 January 2016

'Tis the season for kitting out boats here in the shop. It is keeping the business very busy as we finalize the Goat Island Skiff kits and in January we'll be "kitting" Clint's design, the Drake Rowboat.

FAQ's

What is unique about our kits?
Clint's kits are the equivalent of a professionally built boat, dry fit to perfection, and then taken apart and packaged so that you can replicate the results at home. That means the hull lines will be "eye-sweet" and beautiful when you assemble the boat. The numerous and subtle tweaks that a professional builder does to make the lines of a boat 'sing' has been done for you. This is the unique part of our kits: the kit is not cut directly from a computer file, but rather comes from directly from a hull built by an accomplished boat builder.

What is included in a boat kit?
Our kits have a number of options to suit your timeline and budget. One option will always include plans and the plywood components, planks and bulkheads or molds. The plywood is BS1088 Okoume and comes from Maine Coast Lumber, a trusted source for us. Timber kits are available. Pre-laminated components are available, frames, stems, and backbone components. A further option is a complete timber kit that gets you set up with seats, gunwales, floorboards and all the wood you need to build the boat. You can see kit information at our website kit information page.

Why buy a kit?
When I suggest to people that they buy a kit they sometimes are offended because they feel we don't think they have the skills to make their own kit. The truth of the matter is that we build our own boats from kits as well. In fact, a successful Pro Boatbuilder will build from boat kits himself. The reasons are the same as for you and me: it saves a lot of time, it saves money due to less waste in materials and less wasted time, and the results are a better boat. The boat fits together with less fuss and the lines are reproducibly beautiful every time.
Read More..
Recently two came out, one in Small Boats Monthly and the other on the brand new, UK-based Barnacle Bill. Small Boats covered the Calendar Islands Yawl and Barnacle Bill had a piece by a customer in the UK who has built and avidly rows a Drake 17.

A Calendar Islands Yawl based in Duluth, MN
The orogonal Drake 17 rowed by me in one of the Small Reach Regattas

Sorry these may not show much unless you have a subscription. Believe it or not I don't read much boats stuff....but these are very well worth he money. Both rags will require good contact and readership. So far the writing is excellent!
Read More..


Congrats to Barbara Simon, the new owner of the Willard Beach Dory (WBD), a new stitch-and-glue dory skiff drawn by Roger Long who has retired and is off cruising. Roger left behind a few gorgeous designs for me to 'kit' and market as new boats, the (WBD) being one of them. The others are the YawlDory and a 16' Herreshoff-like double paddle canoe, which is a thing of beauty and may be the only paddle boat I end up putting in the catalog.


The WBD is out of 6mm plywood and will be rowed in and around Casco Bay. She'd be an ideal tender being light, maneuverable and a good load carrier. The oars are our custom spoon blade oars with high quality 14" leathers by Swanson Boat Company.


Stitch and Glue is a quick way to get a boat, but this project was a reminder that this type of construction can take longer than one thinks if you try to get a yachty finish: hiding the fiberglass tape and fillets takes some fairing. With lapstrake, there is a clean plank line to follow. However, the S and G structure is light and strong and relatively inexpensive as kits go.


What other S and G designs do people like that are not available as kits and should be?


Read More..

"I like to get out there sit in the swell and look out" is how I think of a pleasant row in my home waters of Casco Bay, Maine. Along with dreaming of boats, like Culler's Otter, I dream of where to go in the boats. Next year's big row is out to Halfway Rock in the middle of Casco Bay, about 15 mile offshore. You can also see a large scale chart of Casco Bay.

Rowing in open water like this scares the hell out of me. When I sit there, in the swell, looking out, the butterflies flutter inside, making it more challenging to assess the situation and peruse the mental checklist of precautions. Weather window, ferry traffic, tidal currents, my energy level, time of day, schedule back on land, amount of food in the dry bag, do I have all the gear I need, what is plan B, plan C....

But I am learning that these butterflies are annoying but good; they keep me alive and ultimately confident. Once I am out there in open water, and I am feeling strong, confident in the boat, and having a blast, I relax and therefore row better. In my open water boat, Drake, I can cover about 4 nm per hour and that is an average. Time slips away and life is good. Christmas has been wonderful, and the weather cold, and now I begin to plan big rows for next year. I am training for long distance rows and hope to make a 20-mile row somewhat routine. Halfway Rock, located below the 'Not' in "Not for Navigational Use" is uncannily "halfway" between the Eastern and western points that define Casco Bay. It is an exposed rocky isle with a lighthouse. Landing there will be difficult, so when I row there next summer, it will be my longest pull yet, at least 25 miles total, depending on the exact route.

Time to dream, be patient as the sun makes its way back north, and time to get in shape!
Read More..
I have shown the Building the saloon settees.
Looking forward at the foredeck, with deck beam flange being laminated.
This is the second boat of our design that Fred has built. Five years ago he built a Didi Cruise-Mini that he sailed for a few years, then sold recently. Watch this space for more photos of the progress of Fred's project.

See more of this design and others in our portfolio, at /.
Read More..

Fleshing out the Calendar Islands Yawl

Modeling the Interior

While I am actually breaking out the geometry of the final 3D computer model, the interior of the "in-the-flesh" model was glued in yesterday and I'll prime it today.

Cutting out quarter scale bulkheads for Calendar Islands Yawl interior.

It never ceases to amaze me how everything just fits. Paper patterns are Spray77 tacked to 1/8" plywood and cut to the line on the bandsaw. Then the parts are glued into place with little to no refinement and they fit well. It makes this method of proving out the hull design quite efficient.

After hull turnover in actual full-size construction, this is what the boat interior will look like.

The beauty of kit construction, is that we set up stem, bulkheads, and transom on a CNC cut, self-jigging strongback. And after planking, we turn over the hull and the interior structure is already complete. In traditional construction, the molds would be removed and bulkheads fit in their place. Kit construction allows the professional and home-builder to skip the time consuming steps of making patterns and scribing in bulkheads.

After turn over, the tank tops are put in place. They play an important structural role in stiffening this very light boat.

Stay up to date with me as next I'll prime the hull and make paint choices. Furthermore, the cutting files will be ready for CNC cutting of the first kit. 


Read More..

Saturday, 30 January 2016

 
Newly launched, Den's 24' Ulua cranking it on out in the Manukau Harbor, New Zealand with a temporary windsurf sail.  A more crab claw styled sail is in the works, but 11 knots ain't bad for this little rig.


In the beginning.
Read More..
The Deer Isle Koster is a new kit that will hit the market by November. We are very excited about

this addition to the catalog. I finally had a chance to sail with the designer, Bruce Elfstrom, at his summer camp on Deer Isle in Maine. Bruce designed these boats for his daughters to sail. It is always wonderful to visit the provenance of a great design and to sail with the designer!


I was most struck by how high the KDI pointed sailing upwind. The foils and jib headed lug rig are very effective. I was also struck by how nicely the helm balanced and, overall, how easily she sailed. I was most satisfied about this last point because this little boat will make a great boat for introducing children to sailing small boats.


Both well over 6' and 200 pounds (I will not go into specifics!), Bruce and I had plenty of room in the cockpit with room for kids and under deck places to stow snacks and other gear.


We are currently finishing the 3D model work which will be used to make the 2D parts that are cut on a CNC routing machine and become the basis for the complete kits. To learn a ton more about how this works please read a PDF about boat kitting.


Also feel free to visit the WoodenBoat Forum thread on the KDI.


Read More..

Read More..
 2Oceans 1Rock

It's rare to hear such solid advice as this and I think the guy may have a chance.

Equipment Failure: Anyone who has sailed offshore knows that Murphy is the only law that applies once you’ve left the dock. In my experience, the best time to push the boat to it’s limits is before an actual event. I’ve done it both ways, and I’m going back to my roots on this one with the goal of keeping the boat as simple as I can while still allowing it to perform well. That will require about a year of sea trialing in a relatively controlled environment (Gulf of Mexico/Atlantic coast) before leaving for the 14,000 mile voyage. My approach to this project is to not become greedy about eeking out an extra percentage of a knot at the risk of keeping things reliable. The fewer moving parts the fewer things there are to break, but you’d be surprised how difficult it is to ignore the “if we added ____, the boat would be ____ faster at this angle”. Moral of the story, K.I.S.S.


Read More..
The First layer of radius being fitted to Mike's boat.
The rebate along the edge of the side panel can be seen in this photo.
Final hull shape starting to become clear.
Construction of the boat in Latvia has now started and the boat in Greece will soon follow. To see more of this design and others in our stock design range, please visit .
Read More..

Friday, 29 January 2016

about a year late... but hey. what can you do.
hopefully it will all be done in time for the states on the 19th of april. if the new foil's maiden voyage is race 1 then i guess that constitues success. !.
The foil is designed with some sneaky new improvements, and i have re-surfaced the moulds (they are a fraction more accurate to the NACA shape now) and added and subtracted aluminim strips as appropriate. The front edge of the foil is now 10mm forward of the strut, so that the rod has more leverage on the flap. I've stuck the moulds back together like before, so that all the angles are adjustable, using longer bolts this time, and the result resembles some kind of fusion beween a smoked chedder and a jarlsberg. lots of crumbly holes. whatever, they'll get covered in wax and resin anyway.

I've also designed a new gantry, maxed out to 500mm, as the spacing between my foils is, well, close, due to the limitations of working with an existing boat. Ill make a good mould for this so that sometime down the track, if need be, i can make a good, light version with my vacuum gear that im going to buy when i get cash. Although if there is a new hull, there may as well be a new gantry. orrite so ill make a slap-up mould. or just buy vaccuum gear now.
I've sussed out a (hopefully more effective) new rudder flap adjustment system using a piece of string and a cleat and some elastic/pulleys etc. we'll see how that goes.

also my stsainless cables inside the foils are going to get replaced with some nice smooth fibreglass rod. the centreboard first, the rudder may need to wait until after the states. Ultmately there will be a bladerider style tube through the foredeck so i can do away with the friction-friendly throttle cable. and a new wand hinge mechanism.

i have my work cut out for me i guess, but im on holidays this week so ill get right into it and see if i can't get a foil laid up and a gantry laid up by next friday
to buy:
carbon.
release wax and PVA release agent
resin
fibreglass rod & end fittings
new wing tramps
some rope and pulleys
Read More..
More than 20 years ago Anthony Steward sailed around the world on a tiny open boat. He took the mould plug from my Ant Steward's little boat shipwrecked in the SeychellesAnthony has always been very modest about his achievement and has done very little to publicise it. Most of the publicity that it has received has been through articles that I have written for magazines, the article on my website and his chapter in my book "Shaped by Wind & Wave".

I am pleased to see that this has now changed. A video that was made 20 years ago, documenting his voyage, is now on YouTube. It is worth the 30 minutes to watch it, to understand just how tough this voyage was.


Anthony modified my little boat extensively to serve the purpose that he needed. We have many designs to take you more comfortably around the world or just to take you across your local pond. Please visit /.
Read More..
Drop in Sail rig, ready to go with custom canvas sailbag.


Yawldory Elyssa just launched. We built the masts and spars.


Caledonia Yawl birdsmouth-hollow mast designed by Clint (giving the 'evil eye' above) and built in-house by Steven Bauer and the CY owner.

One of our favorite projects is making birdsmouth-hollow masts and spars, but even more rewarding is working with great sailmakers who specialize in small boat sails. We work with them to have the sails made to fit the spars and lace them, make the lines, attach blocks and hardware so that someone can get a complete, drop-in rig from us and go sailing. It is very rewarding. Just delivered was a complete sail rig in a custom canvas sail bag by Mobile Marine Canvas. Just launched was a wicked-light set of masts and spars for the Yawldory Elyssa by Roger Long. The first sea trial was very successful. The masts are spruce made with the birdsmouth construction. Being finished right now in the shop is a new design for a hollow mast for the Caledonia Yawl. We have modified the original mast drawn by Iain Oughtred to be lighter and stronger for Birdsmouth construction. The tolerances involved are a little finer than working with solid masts, because the stiffness and strength of the mast will be a function of overall diameter, wall thickness, and wood type. All these factors, including the on-water use of the mast/spar, are considered when we design and build a mast. The important thing is that the load in the boat is what will exert the stresses on the mast. This load comes primarily from the weight, heeling moment, and crew of a small boat, more so than the wind strength.
Read More..
went out today for a few hours to test the new modifications. conditions were like 3 to 12kts. anything above about 8 i was foiling, though probably needed 10 to go upwind and downwind propperly. everything worked well, no breakages, nothing moved at all. didn't capsize or crash, but i was playing it pretty safe. tried a foiling tack and almost threw myself off the back corner of the wing, holding onto the tramp lacing with my feet. it turns much quicker on foils!

The linkages work much better, and the rudder adjutment in particular is a massive step up from what i had. the wand vibrates when going slow, which is annoying, so ill take to it with the grinder and make it flatter on one side. also thinking about a flat surface on the end, so that not as much of it drags in the water.

i need a new sail.

im not quite happy with the angle of the centreboard. i noticed that i had the rudder trimmed back, flap up about 5 degrees, to the point where half the time it was actually pulling the transom down; you could see because the top gudgeon was touching the top of the gantry, rather than there being a small gap. seems to me the rudder foil could be smaller. before i go cutting stuf im going to make an F-box of sorts, a contraption that lets me adjust the rake fo the centreboard over about 5 degrees on the fly. also i want to put a small bulb at the T joint of the centreboard, to hide a wad of carbon uni that i will wrap around the leading edge at the T. the crack didnt get any bigger, but im not going to risk breaking this foil. so there's 2 or 3 projects to keep me busy(er).
Read More..

Team Pure and Wild should win the Race to Alaska if they keep it all together and right side up.

Read More..

Thursday, 28 January 2016

gh

For those who aren't all over it yet, grasshopper is a plugin for Rhino that allows you to build 3d models parametrically. You can choose to model the normal way and just let grasshopper calculate the surfaces, or draw every component from scratch in grasshopper. By using number sliders for certain dimensions, you can create fully adjustable 3d models that you can easily change and optimize after finishing the model.

In my experience this type of modelling is normally used to make things like this:


But that said, I know people use tools like Catia and Generative Components in all sorts of industrial and product design fields. So parametric models are probably being used to make boats. In fact, I'd say that if you are trying to design a boat and not using a generative 3d model, then you're doing it tough.

Here's a screen vid of one of first forays into moth design using grasshopper - the parametric wing: Apologies for the daggy commentary and vigorous cursor gestures!

Read More..
A potential builder of the Didi 950 Stability Graph. Click to enlarge.With no wind or waves and the ballast tanks on one side filled, the boat will not rest upright. It will heel over until it stabilises at a heel angle that places the CG vertically in line with the centre of buoyancy (CB). That will be the nearest crossing of the curve with the 0 line, which is at 5 degrees in this case, seen on the blue curve. Add some wind to bring the boat to 0 degrees heel and the righting moment that is working is the point where the red curve hits the left edge of the graph. Without water ballast the boat must heel to 6 degrees to reach the same righting moment. That is where the power benefit is coming from with water ballast, the boat will sail more upright than with empty tanks, in the same wind strength.

Note that all three curves are closely bunched when the boat is heeled 90 degrees. This is a knock-down situation, probably from losing control when driving hard downwind under spinnaker. The mast is horizontal but not in the water. This bunching of the curves at 90 degrees is because of the position of the ballast tanks in this design, low in the boat fairly close to the vertical CG. There would be a bigger spread if the tanks were located high up under the deck.

The red curve shows the benefit of increased righting moment when the windward tank is filled. There is considerably greater gain in stability shown by the red curve than lost stability, shown by the blue curve, when ballast is on the wrong side.


All three curves show that the wind alone can't capsize the boat. When the mast hits the water there is still considerable righting moment available for all three situations. If the boat is in large waves and hit by a big one while knocked flat, the added energy from the wave can capsize the boat in all three situations. 

It seems counter-intuitive but the condition most likely to invert the boat under wave action after a knock-down is with the water ballast to windward (red), i.e. the condition in which the boat will be sailed in strong winds. This is because after the water ballast passes beyond the point where it is vertically above the overall CG of the boat that extra weight is on the wrong side of the CG and is helping to capsize the boat rather than to bring it back to upright. It pulls the red curve below the green curve and reduces the AVS from 133 degrees to 122 degrees. 

Overall it takes more energy to capsize the boat from upright with water ballast than without, evaluated by comparing the area enclosed by the red curve with the area enclosed by the green curve. When the area enclosed by the blue curve is compared with the green curve, there is very little difference. It will take a similar amount of energy to capsize the boat without water ballast and with water ballast on the wrong side, when going from upright. Ironically, the wrong side has the greatest amount of reserve stability after a knock-down and has the greatest angle of AVS, so it is the condition least likely to capsize after a knock-down.

Back to our capsizing boat. Once past 122 degrees it is into a big range of negative stability that shows as the area enclosed by the red curve below the 0 line, taking it all the way to 180 degrees, i.e. totally upside-down. But see that the curve does not return to 0 at 180 degrees, which means that it is unstable at that angle. Same as happens when the boat is upright, the water ballast off to one side prevents the boat from resting at the 180 degree position. It has to rotate to where the CG is vertically aligned with the inverted CB. That is at the point where the curve crosses the 0 line. If the red curve is extended to the zero line it will be to the same angle that the blue curve crosses,  i.e. 160 degrees.
 
There is no windward or leeward when the boat is upside-down, the sails are under water. The boat is stable in the 160 degree position, so leaning 20 degrees to one side of upside-down. It needs to get past the nearest zero crossing to come back to upright. The boat doesn't care which way it goes. It needs a lot of energy to go back the way that it came along the red curve but very little energy to get to the 140 degree AVS crossing of the blue curve. With the motion from just a small wave it will continue past that 140 degree point. Once that point is passed, the righting moment of the blue curve takes control and will return her to upright. If the rig is still standing then the sails will fill and she will be back into the stability situation shown by the red curve. She has capsized along the red curve and righted herself along the blue curve.
In essence, it will take a lot less energy for the boat to right itself with water ballast than without, so she should right herself more quickly with the water ballast. The difference is that without water ballast she can go either way from inverted to upright but with water ballast she has to go full circle.

To visit our website, go to  /


Read More..
I'd been using this brailing line setup for a few years on my own Ulua so when Dennis Bullen asked me to make a sail, by cutting down an old genoa jib,  I installed the same system.  Grommets are placed in an arc equidistant from the tack of the sail.  The brailing line is fed in and out of the grommets and is tied off at the boom.  I had had problems with chafe on the old system especially when using synthetic line which can actually burn/wear holes in the sail.  The radial system does a better job of controlling the loose parts of the sail when partially brailed, and is less likely to chafe the sail.


Dennis is pleased with his new sail which at 100 SqFt is better suited to his 24' stretched Ulua.
Read More..
Yesterday "Black Cat", the "Black Cat" finishing the Governor's Cup Race. Photo courtesy of What The Saints Did Next.When I wrote my piece yesterday I was still seeing the breaking news about "Black Cat" being the true line-honours winner instead of "Avanti", which finished ahead of her. I was concerned that there may have been a measure of speculation in the reports and that they may prove untrue. Now we know that the reports were correct and "Black Cat" is the true line-honours winner in the racing division and likely handicap winner as well. We won't know for a few days yet if "Iechyd Da" can catch her on handicap.

Don't let the small size of the racing fleet at the finish detract from the achievement of Dave Immelman and crew. All boats in the original racing fleet were well behind them and most jumped ship when the breeze went light and their sailing progress became too slow, deciding to change to the cruising class and motor through the calm patches. The NOR, as amended, did allow the racing class boats to do this but they had to notify Race Control of having motored at the "earliest opportunity" as well as in their declaration at the finish.

"Black Cat" was committed to racing and that is what they did, battling through the calms. It must have been soul-destroying to see another competitor in their class sail around them, apparently in stronger breeze, then continue to take line-honours in monohulls and racing class. Declaring hours after finishing that they had in fact motored and then being allowed at that late stage to drop down to cruising class is just wrong on all levels.

Did they in fact advise race control in the next daily position report after motoring and race control forgot to move them into the cruising class? This would seem odd because they would have seen themselves still in the racing class in the daily results and should have again told Race Control of the change that they had made. If they didn't tell race control then the act of motoring was an immediate DSQ from the racing class. If they didn't transfer correctly into the cruising class in the way permitted by the amended NOR then they should not be allowed to do so after finishing the race either. My opinion is that they are DSQ in the racing fleet and did not join the cruising fleet because they did not act according to the amended NOR. It follows that they didn't complete the race even though they completed the course.

Their continued listing as apparent leader of the racing fleet added interest to the race but skewed the daily results of both monohull fleets. It also had considerable effect on the moral of other competitors. I believe in absolute fairness and sportsmanship in yacht racing and all other sports but there appears to be something lacking in that regard with this situation.

I will watch with interest to see the final results.
Read More..
The article about our January capsize in the Cape to Rio Race is now in print in Graphic from Professional Boatbuilder magazine of the start of the capsize.In retrospect, the thing that amazes me most about this event is this. I was upright, walking through the boat at the time, heading for the cockpit. I was unaware that we were being capsized until the cabin roof hit the water at the bottom of the wave, with the boat well rotated toward upside-down. It happened very fast, with the boat moving through an arc that must have applied large centrifugal forces, enough for me to be well past horizontal and still walking on the cabin sole. Everything else in the boat stayed in place through that process as well, only becoming dislodged when we impacted the bottom of the wave.

Those who don't have access to the magazine can read about our capsize in my January posts on this blog.

Visit our website at /.
Read More..
Read More..

Wednesday, 27 January 2016

Some new photos up at my Flickr site for the two past corporate and family boatbuilding events at Mystic Seaport.

One thing we love is that all our participants launch every boat on the third day and they always look great, the people and the boats!

It is interesting that 29 boats were built at Family Boatbuilding and even out of the biggest group of 18 canoe builders led by "man with PA system", none of these canoes were launched and paddled on Sunday.

However, we were out there rowing for a solid hour in our Echo Bay Dory Skiffs. Yeah, kit builders!

Read More..

The Calendar Islands Yawl will be a lug-yawl rig. Details forthcoming!! 

Stay tuned for the quarter scale model of the boat. I'll be assembling the hull to check the fit and fairness of all her lines before proceeding to build out the interior structure and complete the model.


Read More..
This seems to be a period of hull-turning. About 10 days ago I posted about the Axle bolted to bow.
Lifted on engine hoists and turn started.
Cradle ready for the hull, on castors for easy moving.
Safely settled in her new cradle and ready for interior work.
Thanks Mike Vermeersch for the great photo series.

To see more of this and our other designs, please visit. /


Read More..


It has been awhile so this is a quick overall update on projects:

* Goat Island Skiff kits can be cut anytime. Marketing for kits will begin by late Winter time and CNC cutting will be part of the plan. Meetings with CNC companies will happen early winter. I am taking coursework in Rhino/CAD to enable me to create files, modify files, and give them to CNC cutters.

* The Deblois Street Dory lines and offsets are finished an available. Hull #1 is being built by a customer here in Portland. Construction and sail plans are being produced now and plans will be available this winter. Kits for the D St. D will eventually be produced for the kit catalog.

*Frolic, the Flying Fifteen is as it was upon delivery. The keel comes off in the next week. As this is a personal side project, progress on it depends on how much customer work is going on at the time. Clearly, we have been busy with customers, so Frolic sits awaiting her complete restoration.

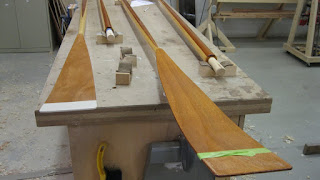
*Carbon fiber blade-Spruce oars are underway and will be part of a line of custom and semi-custom oar and paddle offerings that will become part of our specialty line of products. An online shop will be part of this endeavor, but probably won't be set up until early Spring in time for the Boat Shows. The blades are epoxy, vacuum-infused carbon fiber for total lightweight blades and balanced oars.

* Another specialty is Birdsmouth mast and spar construction for craft up to 22'. In the shop, staves are being cut for a Shellback Dinghy and Goat Island Skiffs. We use beautiful White Spruce and Sitka Spruce. We'll be combining the two species to make beautiful masts. Clint will have a line of mast types to choose from revolving around Birdsmouth construction, with different wood species to choose from for the spars.
Read More..

Late Summer Update and Announcement

The KDI project is fully funded thanks to a group of enthusiastic sponsors. Thank you! I now have a lot of work to do through October!


More screenshots from the computer model of the DRB


Read More..

Tuesday, 26 January 2016


Finally got around to watching my interview from the worlds. Knowing full well that i'm a pretty rough looking bloke I was putting off watching at it in the name of self esteem, but now I've seen it and i think the worlds media team really did a great job so i thought I should share it. The particular 'some guy' mentioned I think was Bill Olsen (with probably the nicest paint in the fleet) - don't think we'd met at that stage.
cheers
Read More..
I have written here before about the versatility of the Argie 15. This week I watched a video posted on YouTube by Özden Oğul, of two couples sailing an amateur-built Argie 15 in Turkey. Normally a 15ft dinghy with four adults aboard is full to the brim with people. This video really brings home the size and comfort of this dinghy as a family fun boat. The winds are light, yet even with this load it is moving along very nicely, with plenty of freeboard to take more.

The crew are spread out in the boat, with one even right up in the bow where you don't normally have someone sit on a boat of this size. It accepts this and carries on sailing. This video highlights how much space there is in this boat.


The Argie 15 is a great camp-cruiser, with a good turn of speed. That also makes it a nice raid boat, capable of taking rough water and covering extended distances.

For more info on this and out other designs, please visit /.
Read More..
Steve Watson is building a Pulled out of the garage.
Half-way over. A hull is intimidating in this position and must be controlled. Gravity can quickly become the boss.
Stern view. Steve has added a scoop stern to the transom.
Going back into the garage for work to continue.
A boat-under-construction takes on a whole new character when it is turned right-way up. This is the first time that the builder gets to see it right-way-up and the final shape of his creation.

Hull-turning is a memorable milestone in a big boatbuilding project. This is always a good time to have a party, to take your rewards and gather your thoughts, resources and energy for the next stage of the project.

The way that Steve and friends turned this hull worked for them. The bigger the boat, the more complex the turning process becomes and the more care that must be taken with preparations and equipment to keep this heavy structure under control. Carelessness with this phase of the project can injure or kill people and also damage the carefully-built boat.

To see more of this and our other designs, please go to /.
Read More..
Skip Johnson has been working at the bleeding edge of experimental, backyard proa design and construction. 
The photo shows the proa tipped on it's side with the ama in the air.  The rigid wing sail is lying on the grass.  Since proas sail in either direction, there is a cassette rudder at each end.
Skip is not exactly new to this sort of thing having built a larger proa some years ago.
Here's a great video about Skip and the kayaks he's designed and built.

Read More..
I designed the Paper Jet in una-rig Lite format.It has proven capable of doing all that I intended, although I have used my prototype #001 as a single-hander for myself. I have cruised it in sedate fashion in light breezes, when it reels off the miles. I have also blasted on trapeze at well over 20 knots just clipping the tops of the waves. And between those two extremes she has given me many hours of fun and exhilarating sailing.
Paper Jet in Turbo format, with asymmetrical spinnaker on the foredeck.

But, I have had knee problems since a teenager, from surfing too many hours in icy cold water without a wetsuit. Now, 50 years later, it has caught up with me. My knees won't let me get out on trapeze any more and my left knee dislocated at least 6 times while sailing this past weekend. In the middle of a tack is no time to be manipulating a dislocated knee back to its intended format.

So, the Paper Jet prototype, sail #001, is for sale. She comes with all components for all three rig formats as well as upgrades that I made to the design over the 8 years that I have sailed her. Included are:-

Standard mainsail
Turbo full-batten fathead mainsail
Jib on roller-furler
Asymmetrical spinnaker with sock
Mast with short and long topmasts
Boom
Retracting bowsprit
Daggerboards - three different lengths
Rudders - old and new versions
All deck hardware
All standing & running rigging
Launching dolly

Selling price is $8,000, which is not a lot more than the material cost to build her with all of the sails and bits that she has. She is in good shape, with totally watertight hull, just needing some minor paint and varnish touch-ups. We will have her at the contact me.

Read More..